

使用 Milvus 實現多模態 RAG


若您想體驗本教學的最終效果,可直接前往線上示範。
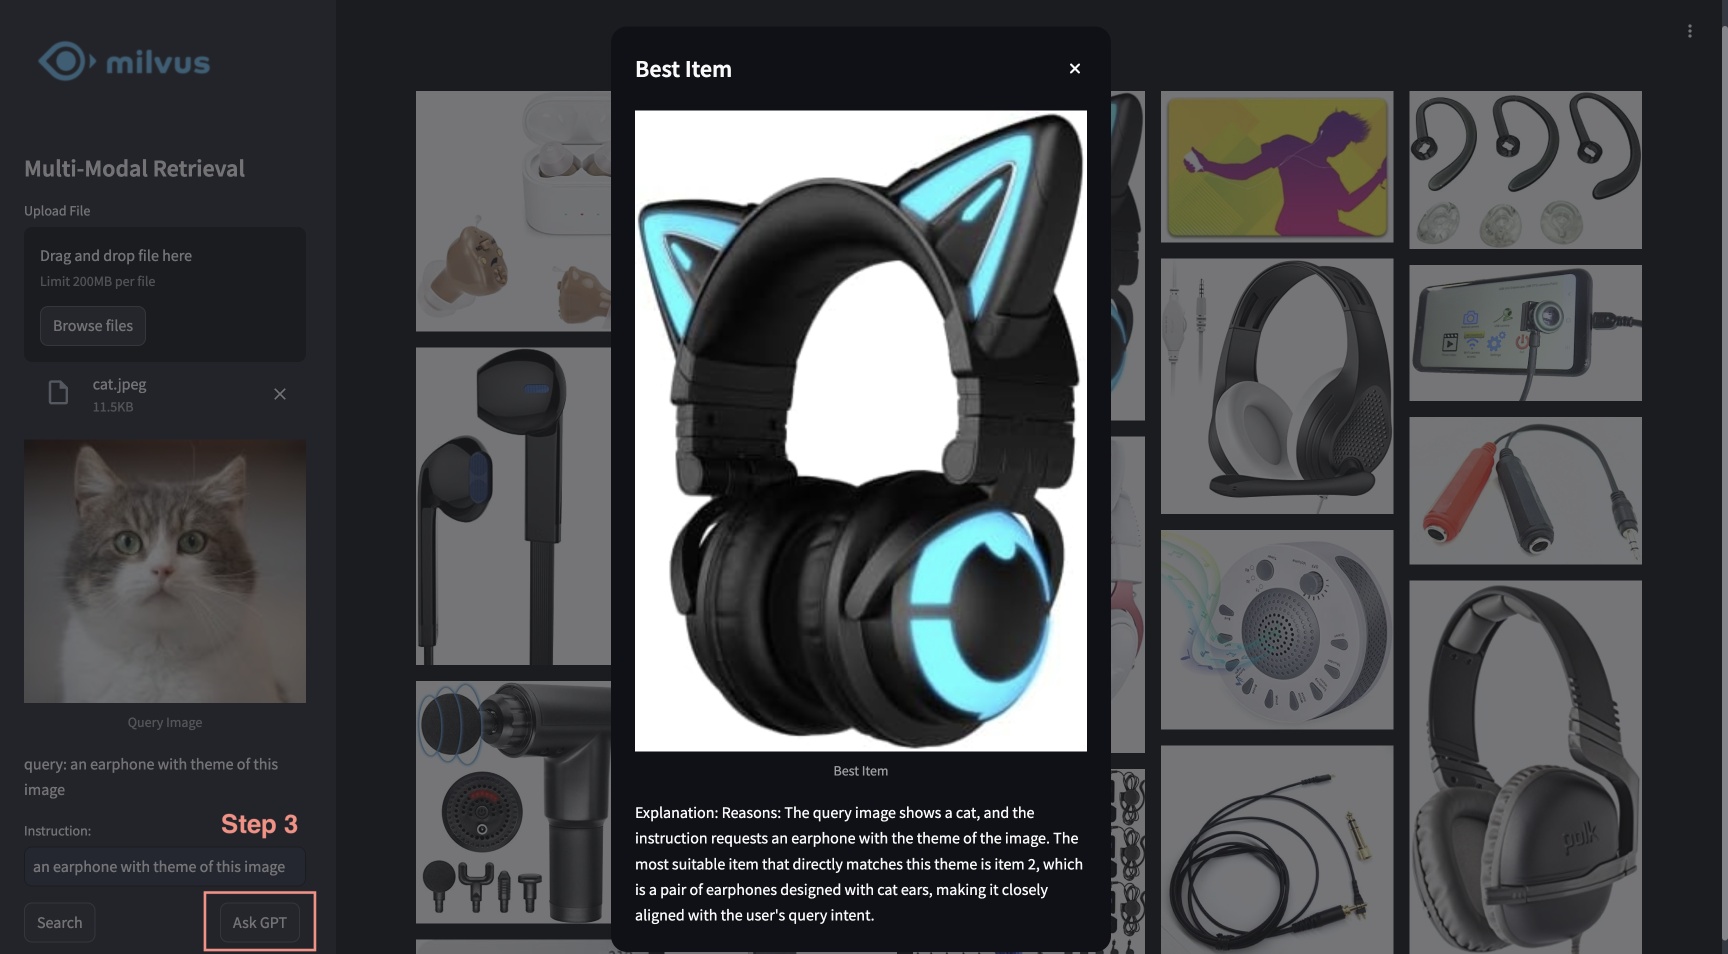
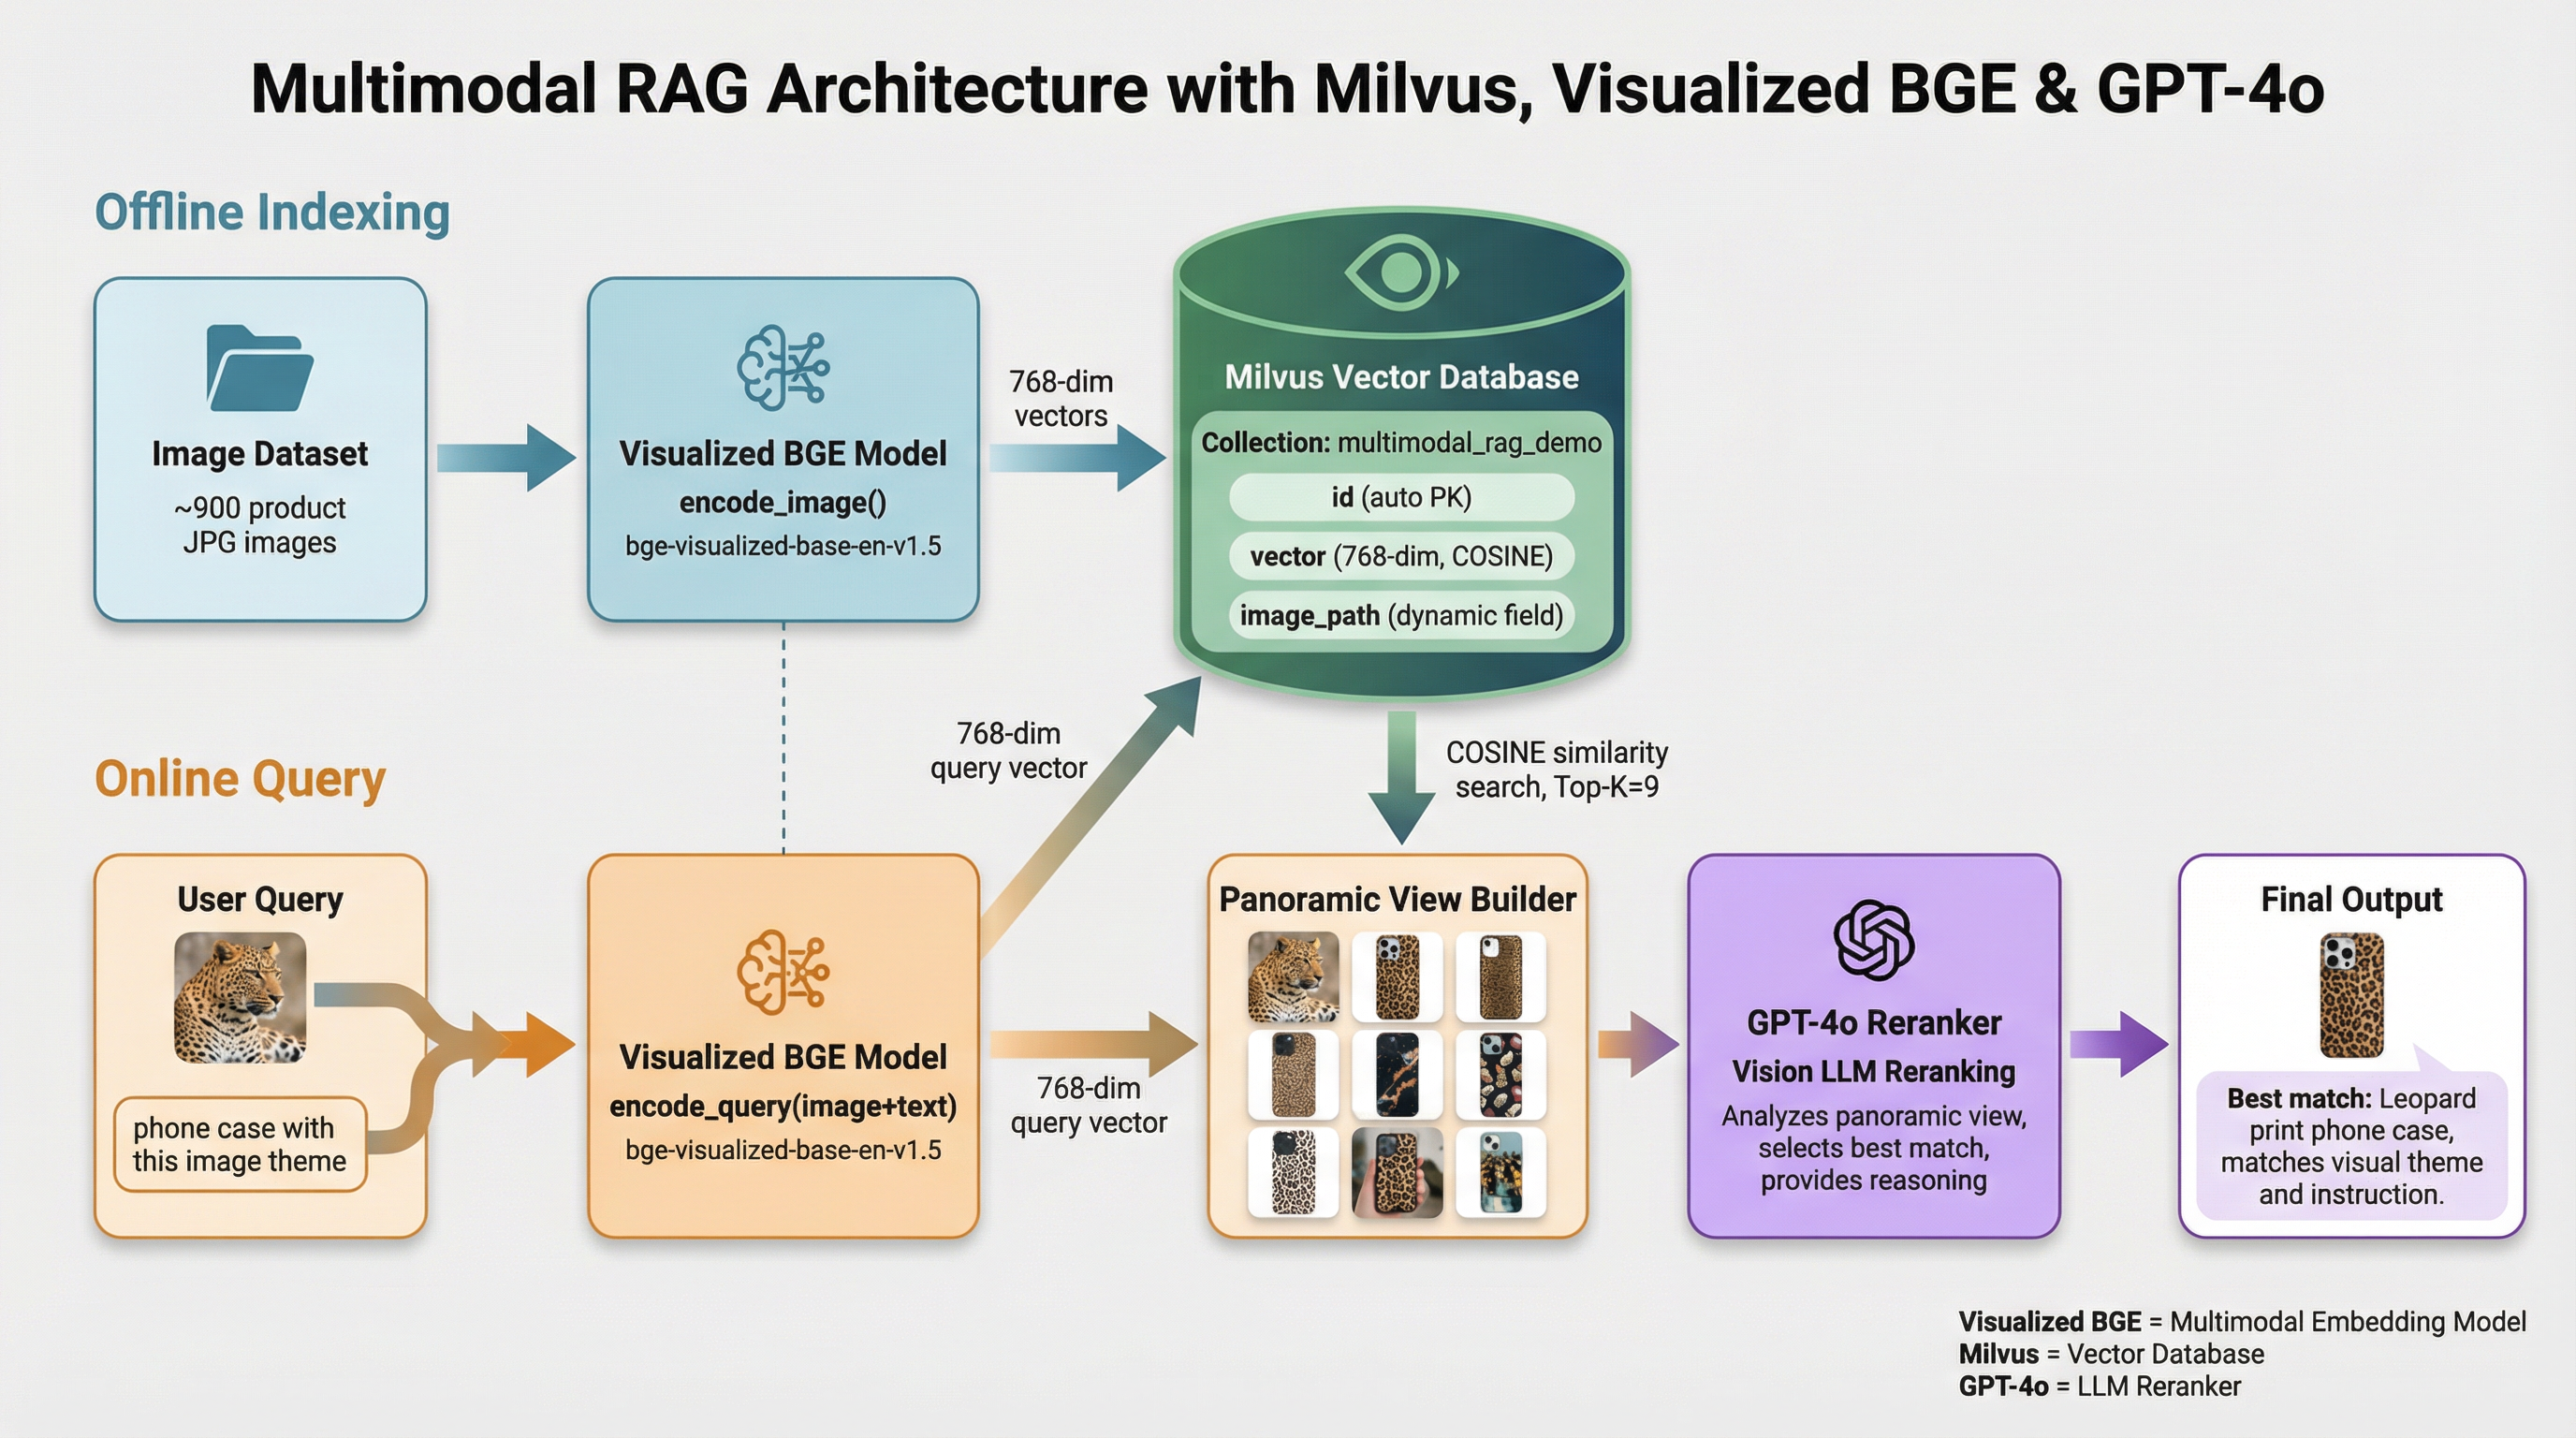
本教學展示了由 Milvus、Visualized BGE 模型及 GPT-4o 驅動的多模態 RAG 系統。透過此系統,使用者可上傳圖片並編輯文字指令,這些指令將由 BGE 的複合檢索模型進行處理,以搜尋候選圖片。 隨後,GPT-4o 將擔任重新排序器,篩選出最合適的圖片並提供選擇理由。這套強大的組合能帶來流暢且直觀的圖片搜尋體驗,其中 Milvus 負責高效檢索,BGE 模型負責精準的圖片處理與匹配,而 GPT-4o 則負責進階的重新排序。
準備工作
安裝依賴項
$ pip install --upgrade pymilvus openai datasets opencv-python timm einops ftfy peft tqdm
$ git clone https://github.com/FlagOpen/FlagEmbedding.git
$ pip install -e FlagEmbedding
若您使用 Google Colab,為啟用剛安裝的依賴項,您可能需要重新啟動執行環境(點擊螢幕頂端的「執行環境」選單,並從下拉式選單中選擇「重新啟動工作階段」)。
下載資料
以下指令將下載範例資料並解壓縮至本地資料夾「./images_folder」,內容包含:
- images:Amazon Reviews 2023資料集的子集,包含約 900 張來自「家電」、「手機與配件」及「電子產品」類別的圖片。
- leopard.jpg:一個查詢圖片範例。
$ wget https://github.com/milvus-io/bootcamp/releases/download/data/amazon_reviews_2023_subset.tar.gz
$ tar -xzf amazon_reviews_2023_subset.tar.gz
載入嵌入模型
我們將使用可視覺化的 BGE 模型「bge-visualized-base-en-v1.5」,為圖片和文字生成嵌入向量。
1. 下載權重
$ wget https://huggingface.co/BAAI/bge-visualized/resolve/main/Visualized_base_en_v1.5.pth
2. 建構編碼器
import torch
from visual_bge.modeling import Visualized_BGE


class Encoder:
    def __init__(self, model_name: str, model_path: str):
        self.model = Visualized_BGE(model_name_bge=model_name, model_weight=model_path)
        self.model.eval()

    def encode_query(self, image_path: str, text: str) -> list[float]:
        with torch.no_grad():
            query_emb = self.model.encode(image=image_path, text=text)
        return query_emb.tolist()[0]

    def encode_image(self, image_path: str) -> list[float]:
        with torch.no_grad():
            query_emb = self.model.encode(image=image_path)
        return query_emb.tolist()[0]


model_name = "BAAI/bge-base-en-v1.5"
model_path = "./Visualized_base_en_v1.5.pth"  # Change to your own value if using a different model path
encoder = Encoder(model_name, model_path)
載入資料
本節將把範例圖片連同對應的嵌入向量載入資料庫中。
生成嵌入向量
從資料目錄載入所有 JPEG 圖片,並套用編碼器將圖片轉換為嵌入向量。
import os
from tqdm import tqdm
from glob import glob


# Generate embeddings for the image dataset
data_dir = (
    "./images_folder"  # Change to your own value if using a different data directory
)
image_list = glob(
    os.path.join(data_dir, "images", "*.jpg")
)  # We will only use images ending with ".jpg"
image_dict = {}
for image_path in tqdm(image_list, desc="Generating image embeddings: "):
    try:
        image_dict[image_path] = encoder.encode_image(image_path)
    except Exception as e:
        print(f"Failed to generate embedding for {image_path}. Skipped.")
        continue
print("Number of encoded images:", len(image_dict))
Generating image embeddings: 100%|██████████| 900/900 [00:20<00:00, 44.08it/s]

Number of encoded images: 900
插入 Milvus
將圖片連同對應的路徑與嵌入向量插入至 Milvus 集合中。
關於 `MilvusClient` 的參數:
- 將
uri設定為本地檔案(例如./milvus_demo.db)是最便捷的方法,因為系統會自動利用Milvus Lite將所有資料儲存至該檔案中。 - 若您擁有大規模資料,可於Docker 或 Kubernetes 上架設效能更佳的 Milvus 伺服器。在此設定中,請將伺服器 URI(例如
http://localhost:19530)設為您的uri。 - 若您想使用Zilliz Cloud(Milvus 的全託管雲端服務),請調整
uri和token,這兩項分別對應於 Zilliz Cloud 中的「公開端點」與「API 金鑰」。
from pymilvus import MilvusClient


dim = len(list(image_dict.values())[0])
collection_name = "multimodal_rag_demo"

# Connect to Milvus client given URI
milvus_client = MilvusClient(uri="./milvus_demo.db")

# Create Milvus Collection
# By default, vector field name is "vector"
milvus_client.create_collection(
    collection_name=collection_name,
    auto_id=True,
    dimension=dim,
    enable_dynamic_field=True,
)

# Insert data into collection
milvus_client.insert(
    collection_name=collection_name,
    data=[{"image_path": k, "vector": v} for k, v in image_dict.items()],
)
DEBUG:pymilvus.milvus_client.milvus_client:Created new connection using: 7f33daeed99a4d8e8a5e28d47673ecc8
DEBUG:pymilvus.milvus_client.milvus_client:Successfully created collection: multimodal_rag_demo
DEBUG:pymilvus.milvus_client.milvus_client:Successfully created an index on collection: multimodal_rag_demo


{'insert_count': 900,
 'ids': [451537887696781312, 451537887696781313, ..., 451537887696782211],
 'cost': 0}
結合生成式重新排序器的多模態搜尋
在本節中,我們將首先透過多模態查詢搜尋相關圖片,接著使用 LLM 服務對結果進行重新排序,並找出附有解釋的最佳結果。
執行搜尋
現在,我們已準備好執行進階圖像搜尋,查詢資料由圖像與文字指令共同組成。
query_image = os.path.join(
    data_dir, "leopard.jpg"
)  # Change to your own query image path
query_text = "phone case with this image theme"

# Generate query embedding given image and text instructions
query_vec = encoder.encode_query(image_path=query_image, text=query_text)

search_results = milvus_client.search(
    collection_name=collection_name,
    data=[query_vec],
    output_fields=["image_path"],
    limit=9,  # Max number of search results to return
    search_params={"metric_type": "COSINE", "params": {}},  # Search parameters
)[0]

retrieved_images = [hit.get("entity").get("image_path") for hit in search_results]
print(retrieved_images)
['./images_folder/images/518Gj1WQ-RL._AC_.jpg', './images_folder/images/41n00AOfWhL._AC_.jpg', './images_folder/images/51Wqge9HySL._AC_.jpg', './images_folder/images/51R2SZiywnL._AC_.jpg', './images_folder/images/516PebbMAcL._AC_.jpg', './images_folder/images/51RrgfYKUfL._AC_.jpg', './images_folder/images/515DzQVKKwL._AC_.jpg', './images_folder/images/51BsgVw6RhL._AC_.jpg', './images_folder/images/51INtcXu9FL._AC_.jpg']
使用 GPT-4o 重新排序
我們將運用大型語言模型(LLM)根據使用者查詢與檢索結果,對圖片進行排序,並為最佳結果生成解釋。
1. 建立全景檢視
import numpy as np
import cv2

img_height = 300
img_width = 300
row_count = 3


def create_panoramic_view(query_image_path: str, retrieved_images: list) -> np.ndarray:
    """
    creates a 5x5 panoramic view image from a list of images

    args:
        images: list of images to be combined

    returns:
        np.ndarray: the panoramic view image
    """
    panoramic_width = img_width * row_count
    panoramic_height = img_height * row_count
    panoramic_image = np.full(
        (panoramic_height, panoramic_width, 3), 255, dtype=np.uint8
    )

    # create and resize the query image with a blue border
    query_image_null = np.full((panoramic_height, img_width, 3), 255, dtype=np.uint8)
    query_image = Image.open(query_image_path).convert("RGB")
    query_array = np.array(query_image)[:, :, ::-1]
    resized_image = cv2.resize(query_array, (img_width, img_height))

    border_size = 10
    blue = (255, 0, 0)  # blue color in BGR
    bordered_query_image = cv2.copyMakeBorder(
        resized_image,
        border_size,
        border_size,
        border_size,
        border_size,
        cv2.BORDER_CONSTANT,
        value=blue,
    )

    query_image_null[img_height * 2 : img_height * 3, 0:img_width] = cv2.resize(
        bordered_query_image, (img_width, img_height)
    )

    # add text "query" below the query image
    text = "query"
    font_scale = 1
    font_thickness = 2
    text_org = (10, img_height * 3 + 30)
    cv2.putText(
        query_image_null,
        text,
        text_org,
        cv2.FONT_HERSHEY_SIMPLEX,
        font_scale,
        blue,
        font_thickness,
        cv2.LINE_AA,
    )

    # combine the rest of the images into the panoramic view
    retrieved_imgs = [
        np.array(Image.open(img).convert("RGB"))[:, :, ::-1] for img in retrieved_images
    ]
    for i, image in enumerate(retrieved_imgs):
        image = cv2.resize(image, (img_width - 4, img_height - 4))
        row = i // row_count
        col = i % row_count
        start_row = row * img_height
        start_col = col * img_width

        border_size = 2
        bordered_image = cv2.copyMakeBorder(
            image,
            border_size,
            border_size,
            border_size,
            border_size,
            cv2.BORDER_CONSTANT,
            value=(0, 0, 0),
        )
        panoramic_image[
            start_row : start_row + img_height, start_col : start_col + img_width
        ] = bordered_image

        # add red index numbers to each image
        text = str(i)
        org = (start_col + 50, start_row + 30)
        (font_width, font_height), baseline = cv2.getTextSize(
            text, cv2.FONT_HERSHEY_SIMPLEX, 1, 2
        )

        top_left = (org[0] - 48, start_row + 2)
        bottom_right = (org[0] - 48 + font_width + 5, org[1] + baseline + 5)

        cv2.rectangle(
            panoramic_image, top_left, bottom_right, (255, 255, 255), cv2.FILLED
        )
        cv2.putText(
            panoramic_image,
            text,
            (start_col + 10, start_row + 30),
            cv2.FONT_HERSHEY_SIMPLEX,
            1,
            (0, 0, 255),
            2,
            cv2.LINE_AA,
        )

    # combine the query image with the panoramic view
    panoramic_image = np.hstack([query_image_null, panoramic_image])
    return panoramic_image
將查詢圖片與檢索到的圖片(附帶索引)整合成全景視圖。
from PIL import Image

combined_image_path = os.path.join(data_dir, "combined_image.jpg")
panoramic_image = create_panoramic_view(query_image, retrieved_images)
cv2.imwrite(combined_image_path, panoramic_image)

combined_image = Image.open(combined_image_path)
show_combined_image = combined_image.resize((300, 300))
show_combined_image.show()
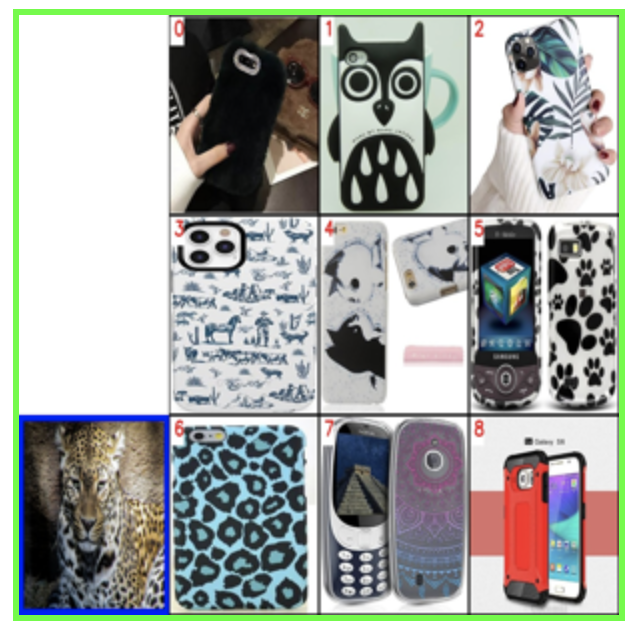 建立全景視圖
2. 重新排序並提供解釋
我們將把合併後的圖片連同適當的提示字串一併傳送至多模態大型語言模型(LLM)服務,以對檢索結果進行排序並提供解釋。若要啟用 GPT-4o 作為大型語言模型,您需要準備您的OpenAI API 金鑰。
import requests
import base64

openai_api_key = "sk-***"  # Change to your OpenAI API Key


def generate_ranking_explanation(
    combined_image_path: str, caption: str, infos: dict = None
) -> tuple[list[int], str]:
    with open(combined_image_path, "rb") as image_file:
        base64_image = base64.b64encode(image_file.read()).decode("utf-8")

    information = (
        "You are responsible for ranking results for a Composed Image Retrieval. "
        "The user retrieves an image with an 'instruction' indicating their retrieval intent. "
        "For example, if the user queries a red car with the instruction 'change this car to blue,' a similar type of car in blue would be ranked higher in the results. "
        "Now you would receive instruction and query image with blue border. Every item has its red index number in its top left. Do not misunderstand it. "
        f"User instruction: {caption} \n\n"
    )

    # add additional information for each image
    if infos:
        for i, info in enumerate(infos["product"]):
            information += f"{i}. {info}\n"

    information += (
        "Provide a new ranked list of indices from most suitable to least suitable, followed by an explanation for the top 1 most suitable item only. "
        "The format of the response has to be 'Ranked list: []' with the indices in brackets as integers, followed by 'Reasons:' plus the explanation why this most fit user's query intent."
    )

    headers = {
        "Content-Type": "application/json",
        "Authorization": f"Bearer {openai_api_key}",
    }

    payload = {
        "model": "gpt-4o",
        "messages": [
            {
                "role": "user",
                "content": [
                    {"type": "text", "text": information},
                    {
                        "type": "image_url",
                        "image_url": {"url": f"data:image/jpeg;base64,{base64_image}"},
                    },
                ],
            }
        ],
        "max_tokens": 300,
    }

    response = requests.post(
        "https://api.openai.com/v1/chat/completions", headers=headers, json=payload
    )
    result = response.json()["choices"][0]["message"]["content"]

    # parse the ranked indices from the response
    start_idx = result.find("[")
    end_idx = result.find("]")
    ranked_indices_str = result[start_idx + 1 : end_idx].split(",")
    ranked_indices = [int(index.strip()) for index in ranked_indices_str]

    # extract explanation
    explanation = result[end_idx + 1 :].strip()

    return ranked_indices, explanation
取得排序後的圖片索引及最佳結果的理由:
ranked_indices, explanation = generate_ranking_explanation(
    combined_image_path, query_text
)
3. 顯示最佳結果及解釋
print(explanation)

best_index = ranked_indices[0]
best_img = Image.open(retrieved_images[best_index])
best_img = best_img.resize((150, 150))
best_img.show()
Reasons: The most suitable item for the user's query intent is index 6 because the instruction specifies a phone case with the theme of the image, which is a leopard. The phone case with index 6 has a thematic design resembling the leopard pattern, making it the closest match to the user's request for a phone case with the image theme.
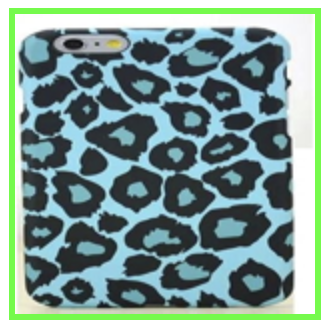 最佳結果
最佳結果
快速部署
若要了解如何透過本教學開始線上示範,請參閱範例應用程式。
