The Developer’s Guide to Milvus Configuration
Introduction
As a developer working with Milvus, you’ve likely encountered the daunting milvus.yaml configuration file with its 500+ parameters. Handling this complexity can be challenging when all you want is to optimize your vector database performance.
Good news: you don’t need to understand every parameter. This guide cuts through the noise and focuses on the critical settings that actually impact performance, highlighting exactly which values to tweak for your specific use case.
Whether you’re building a recommendation system that needs lightning-fast queries or optimizing a vector search application with cost constraints, I’ll show you exactly which parameters to modify with practical, tested values. By the end of this guide, you’ll know how to tune Milvus configurations for peak performance based on real-world deployment scenarios.
Configuration Categories
Before diving into specific parameters, let’s break down the structure of the configuration file. When working with milvus.yaml, you’ll be dealing with three parameter categories:
Dependency Component Configurations: External services Milvus connects to (
etcd,minio,mq) - critical for cluster setup and data persistenceInternal Component Configurations: Milvus’s internal architecture (
proxy,queryNode, etc.) - key for performance tuningFunctional Configurations: Security, logging, and resource limits - important for production deployments
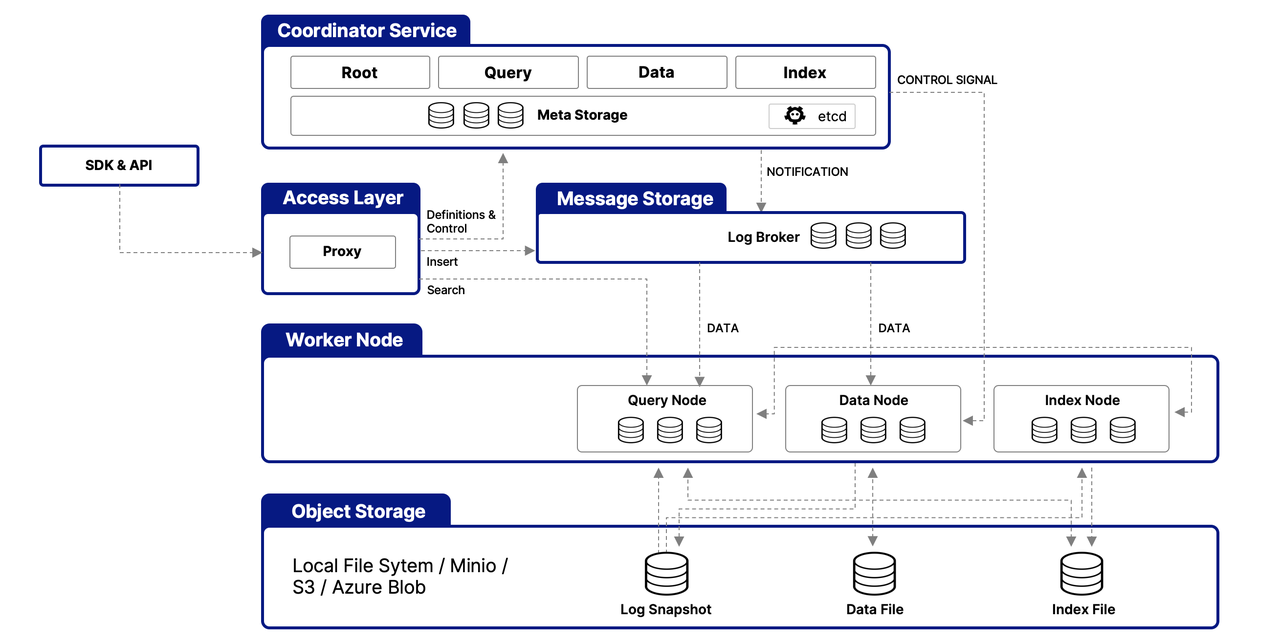
Milvus Dependency Component Configurations
Let’s start with the external services Milvus depends on. These configurations are particularly important when moving from development to production.
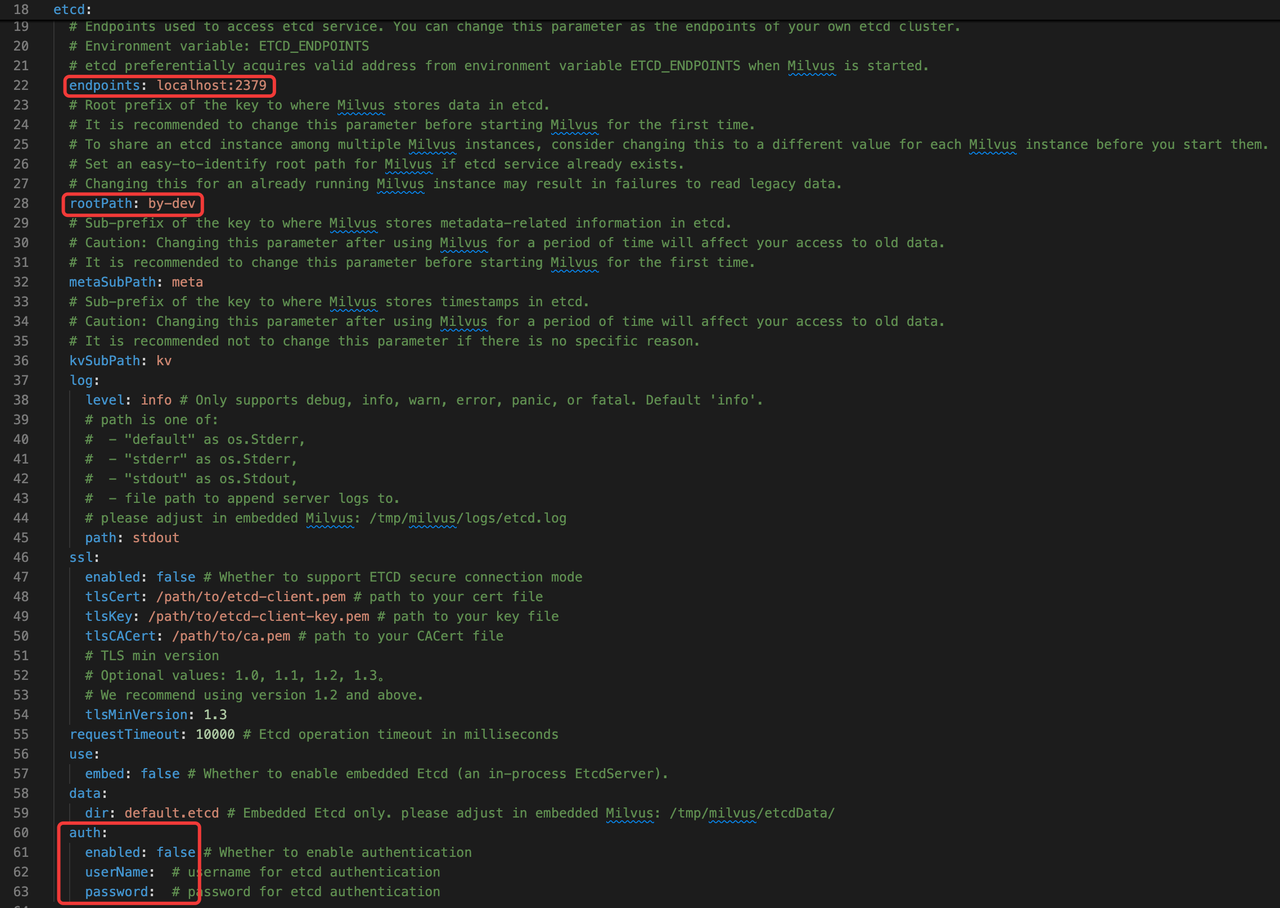
etcd: Metadata Store
Milvus relies on etcd for metadata persistence and service coordination. The following parameters are crucial:
Etcd.endpoints: Specifies the address of the etcd cluster. By default, Milvus launches a bundled instance, but in enterprise environments, it’s best practice to connect to a managedetcdservice for better availability and operational control.etcd.rootPath: Defines the key prefix for storing Milvus-related data in etcd. If you’re operating multiple Milvus clusters on the same etcd backend, using different root paths allows clean metadata isolation.etcd.auth: Controls authentication credentials. Milvus doesn’t enable etcd auth by default, but if your managed etcd instance requires credentials, you must specify them here.
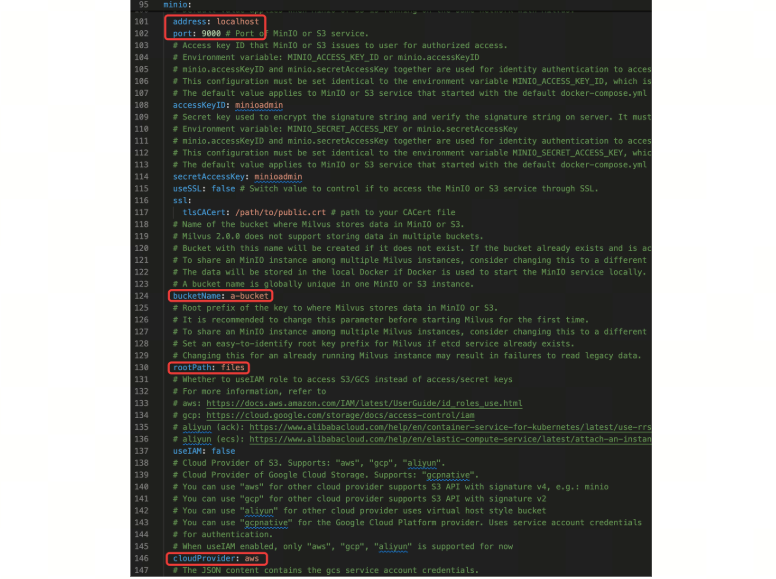
minio: Object Storage
Despite the name, this section governs all S3-compatible object storage service clients. It supports providers such as AWS S3, GCS, and Aliyun OSS via the cloudProvider setting.
Pay attention to these four key configurations:
minio.address / minio.port: Use these to specify the endpoint of your object storage service.minio.bucketName: Assign separate buckets (or logical prefixes) to avoid data collisions when running multiple Milvus clusters.minio.rootPath: Enables intra-bucket namespacing for data isolation.minio.cloudProvider: Identifies the OSS backend. For a full compatibility list, refer to the Milvus documentation.
mq: Message Queue
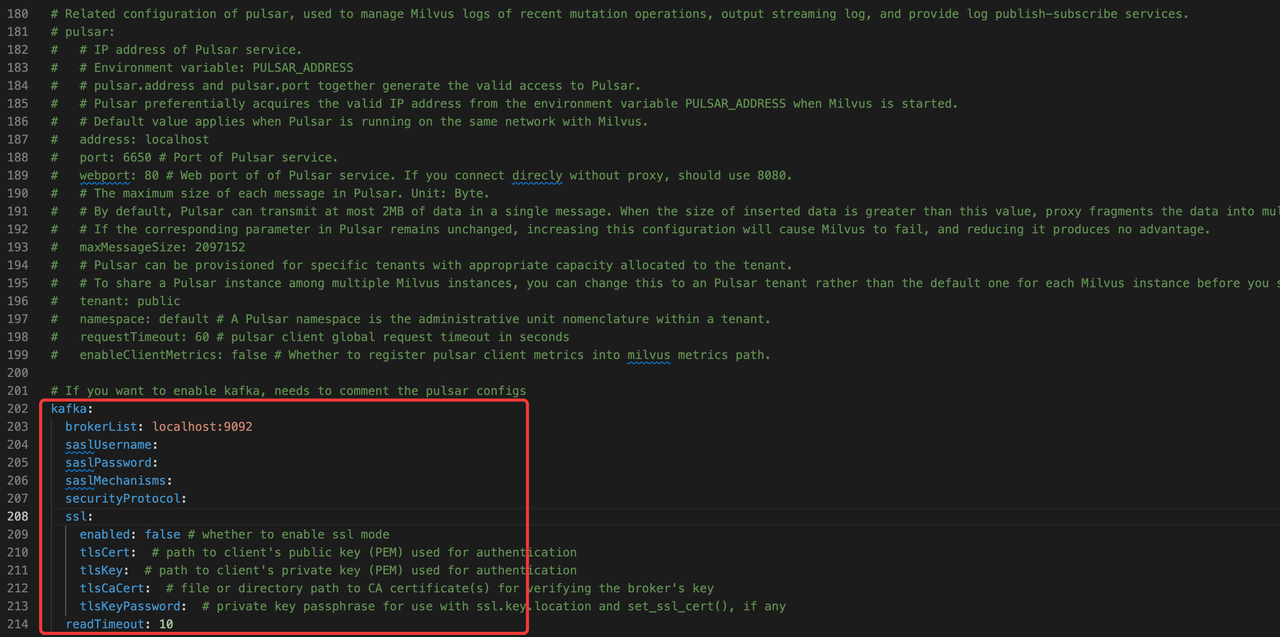
Milvus uses a message queue for internal event propagation—either Pulsar (default) or Kafka. Pay attention to the following three parameters.
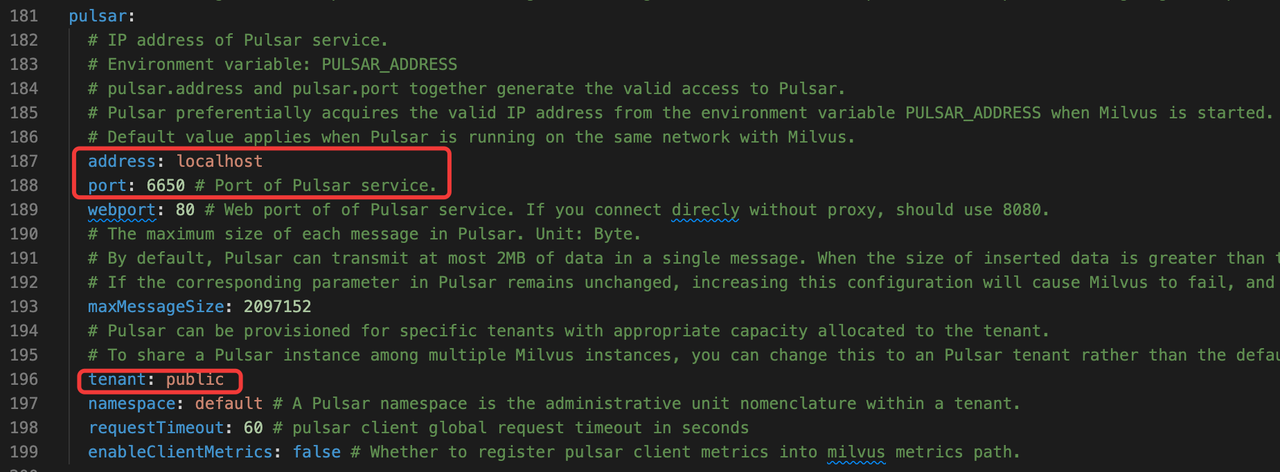
pulsar.address/pulsar.port: Set these values to use an external Pulsar cluster.pulsar.tenant: Defines the tenant name. When multiple Milvus clusters share a Pulsar instance, this ensures clean channel separation.msgChannel.chanNamePrefix.cluster: If you prefer to bypass Pulsar’s tenant model, adjust the channel prefix to prevent collisions.

Milvus also supports Kafka as the message queue. To use Kafka instead, comment out the Pulsar-specific settings and uncomment the Kafka config block.
Milvus Internal Component Configurations
rootCoord: Metadata + Timestamps
The rootCoord node handles metadata changes (DDL/DCL) and timestamp management.
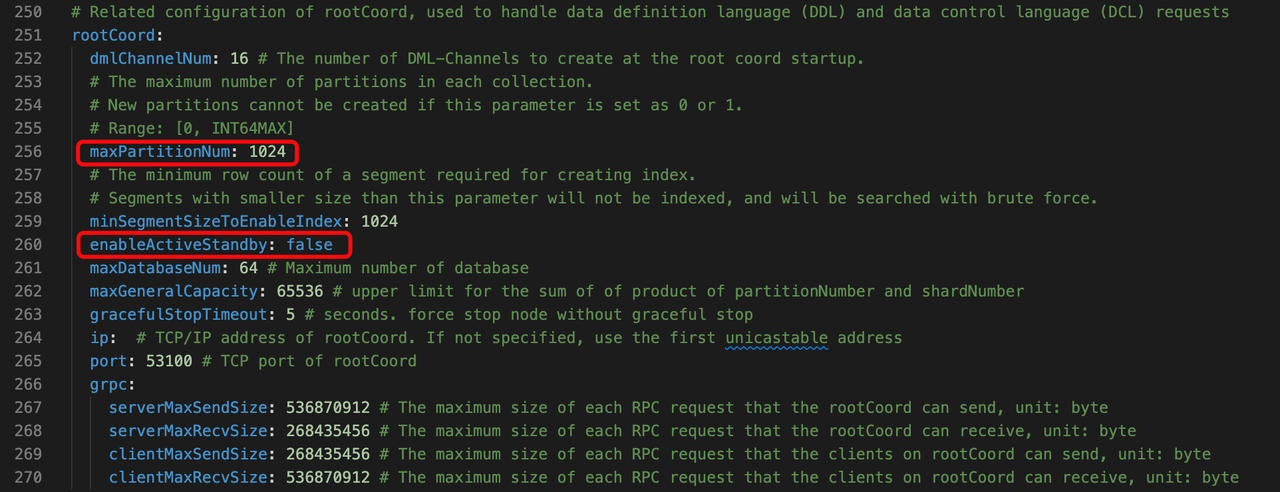
rootCoord.maxPartitionNum: Sets the upper bound on the number of partitions per collection. While the hard limit is 1024, this parameter primarily serves as a safeguard. For multi-tenant systems, avoid using partitions as isolation boundaries—instead, implement a tenant key strategy that scales to millions of logical tenants.rootCoord.enableActiveStandby:Enables high availability by activating a standby node. This is critical since Milvus coordinator nodes don’t scale horizontally by default.
proxy: API Gateway + Request Router
The proxy handles client-facing requests, request validation, and result aggregation.
proxy.maxFieldNum: Limits the number of fields (scalar + vector) per collection. Keep this under 64 to minimize schema complexity and reduce I/O overhead.proxy.maxVectorFieldNum: Controls the number of vector fields in a collection. Milvus supports multimodal search, but in practice, 10 vector fields is a safe upper bound.proxy.maxShardNum:Defines the number of ingestion shards. As a rule of thumb:< 200M records → 1 shard
200–400M records → 2 shards
Scale linearly beyond that
proxy.accesslog: When enabled, this logs detailed request info (user, IP, endpoint, SDK). Useful for auditing and debugging.

queryNode: Query Execution
Handles vector search execution and segment loading. Pay attention to the following parameter.
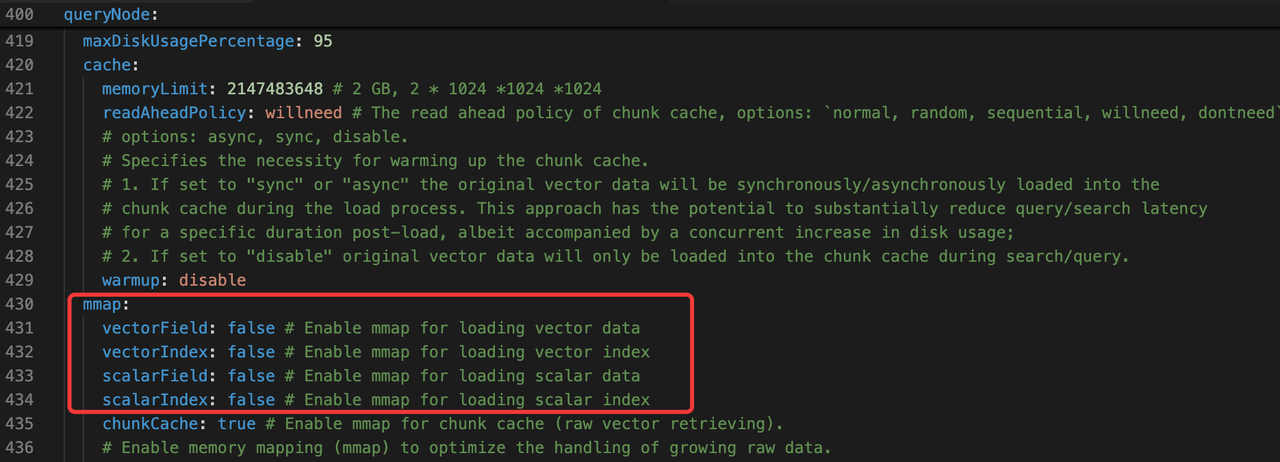
queryNode.mmap: Toggles memory-mapped I/O for loading scalar fields and segments. Enablingmmaphelps reduce memory footprint, but may degrade latency if disk I/O becomes a bottleneck.
dataCoord: Segment + Index Management
This parameter controls data segmentation, indexing, compaction, and garbage collection (GC). Key configuration parameters include:
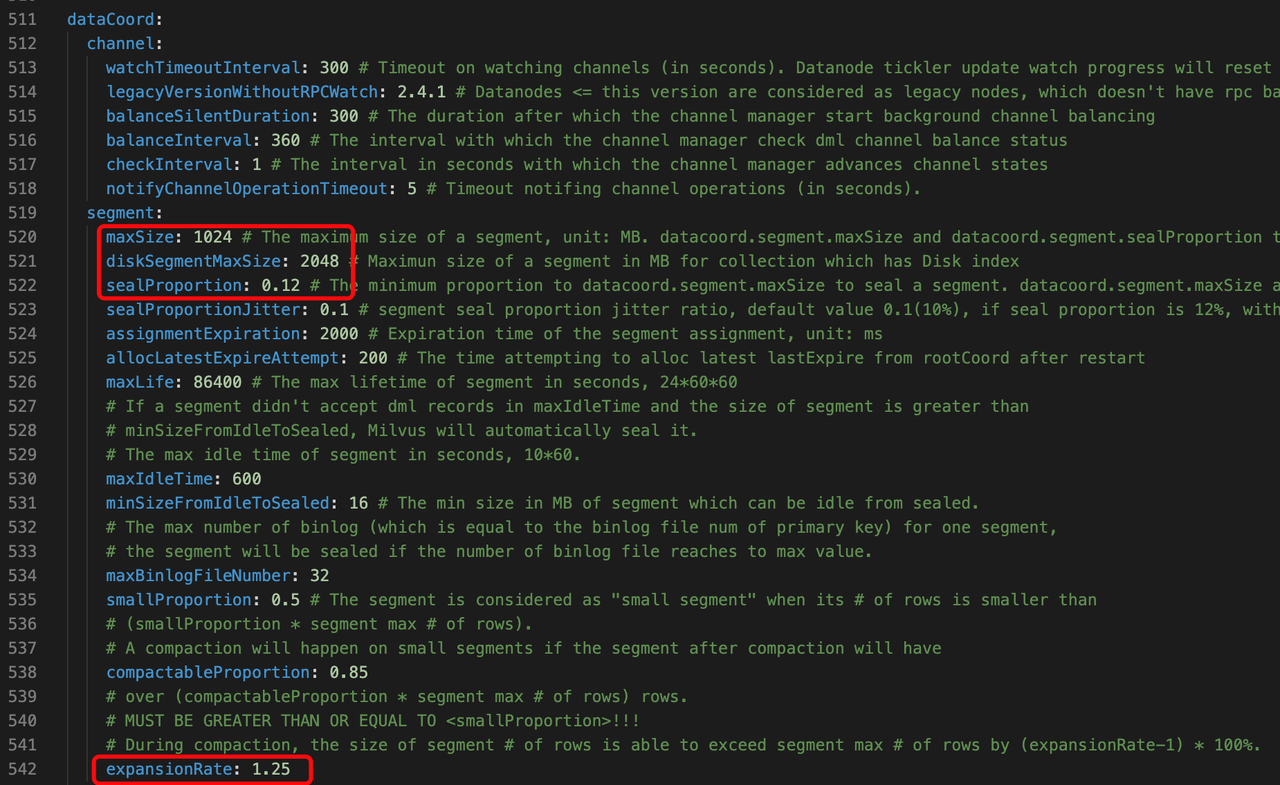
dataCoord.segment.maxSize: Specifies the maximum size of an in-memory data segment. Larger segments generally mean fewer total segments in the system, which can improve query performance by reducing indexing and search overhead. For example, some users runningqueryNodeinstances with 128GB of RAM reported that increasing this setting from 1GB to 8GB led to roughly 4× faster query performance.dataCoord.segment.diskSegmentMaxSize: Similar to the above, this parameter controls the maximum size for disk indexes (diskann index) specifically.dataCoord.segment.sealProportion: Determines when a growing segment is sealed (i.e., finalized and indexed). The segment is sealed when it reachesmaxSize * sealProportion. By default, withmaxSize = 1024MBandsealProportion = 0.12, a segment will be sealed at around 123MB.
Lower values (e.g., 0.12) trigger sealing sooner, which can help with faster index creation—useful in workloads with frequent updates.
Higher values (e.g., 0.3 to 0.5) delay sealing, reducing indexing overhead—more suitable for offline or batch ingestion scenarios.
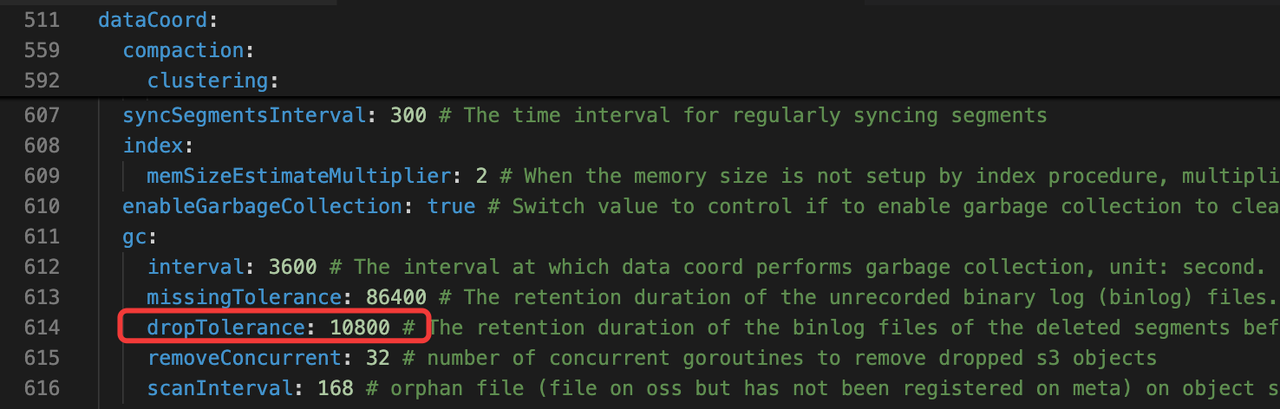
dataCoord.segment.expansionRate: Sets the allowed expansion factor during compaction. Milvus calculates the maximum allowable segment size during compaction asmaxSize * expansionRate.dataCoord.gc.dropTolerance: After a segment is compacted or a collection is dropped, Milvus does not immediately delete the underlying data. Instead, it marks the segments for deletion and waits for the garbage collection (GC) cycle to complete. This parameter controls the duration of that delay.
Other Functional Configurations
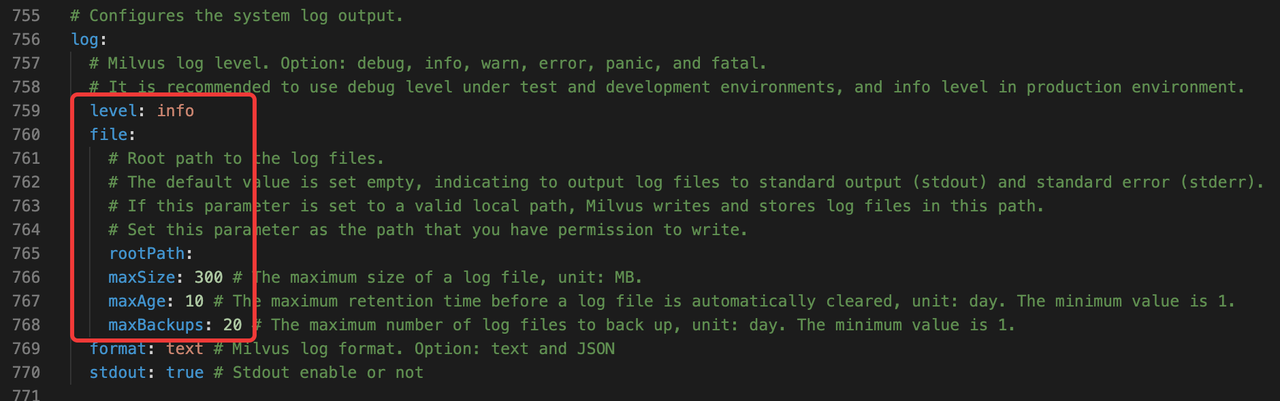
log: Observability and Diagnostics
Robust logging is a cornerstone of any distributed system, and Milvus is no exception. A well-configured logging setup not only helps with debugging issues as they arise but also ensures better visibility into system health and behavior over time.
For production deployments, we recommend integrating Milvus logs with centralized logging and monitoring tools—such as Loki —to streamline analysis and alerting. Key settings include:
log.level: Controls the verbosity of log output. For production environments, stick withinfolevel to capture essential runtime details without overwhelming the system. During development or troubleshooting, you can switch todebugto get more granular insights into internal operations. ⚠️ Be cautious withdebuglevel in production—it generates a high volume of logs, which can quickly consume disk space and degrade I/O performance if left unchecked.log.file: By default, Milvus writes logs to standard output (stdout), which is suitable for containerized environments where logs are collected via sidecars or node agents. To enable file-based logging instead, you can configure:
Maximum file size before rotation
File retention period
Number of backup log files to keep
This is useful in bare-metal or on-prem environments where stdout log shipping is not available.
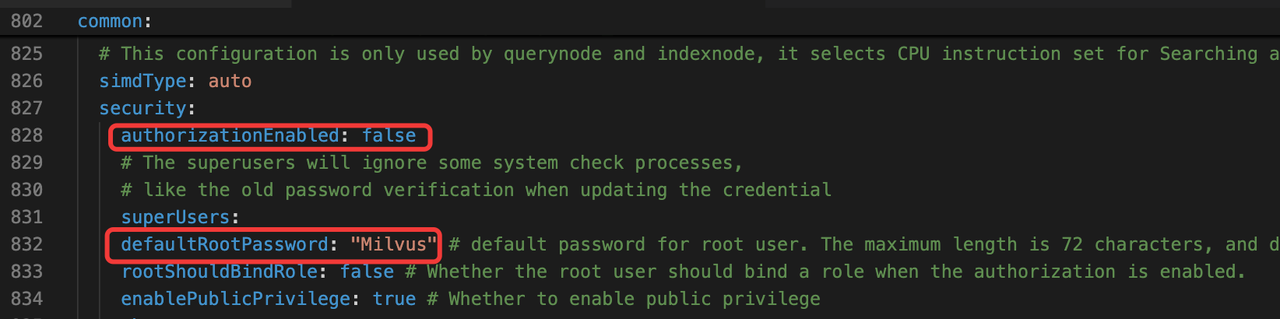
security: Authentication and Access Control
Milvus supports user authentication and role-based access control (RBAC), both of which are configured under the common module. These settings are essential for securing multi-tenant environments or any deployment exposed to external clients.
Key parameters include:
common.security.authorizationEnabled: This toggle enables or disables authentication and RBAC. It’s turned off by default, meaning all operations are allowed without identity checks. To enforce secure access control, set this parameter totrue.common.security.defaultRootPassword: When authentication is enabled, this setting defines the initial password for the built-inrootuser.
Be sure to change the default password immediately after enabling authentication to avoid security vulnerabilities in production environments.
quotaAndLimits: Rate Limiting and Write Control
The quotaAndLimits section in milvus.yaml plays a critical role in controlling how data flows through the system. It governs rate limits for operations like inserts, deletes, flushes, and queries—ensuring cluster stability under heavy workloads and preventing performance degradation due to write amplification or excessive compaction.
Key parameters include:
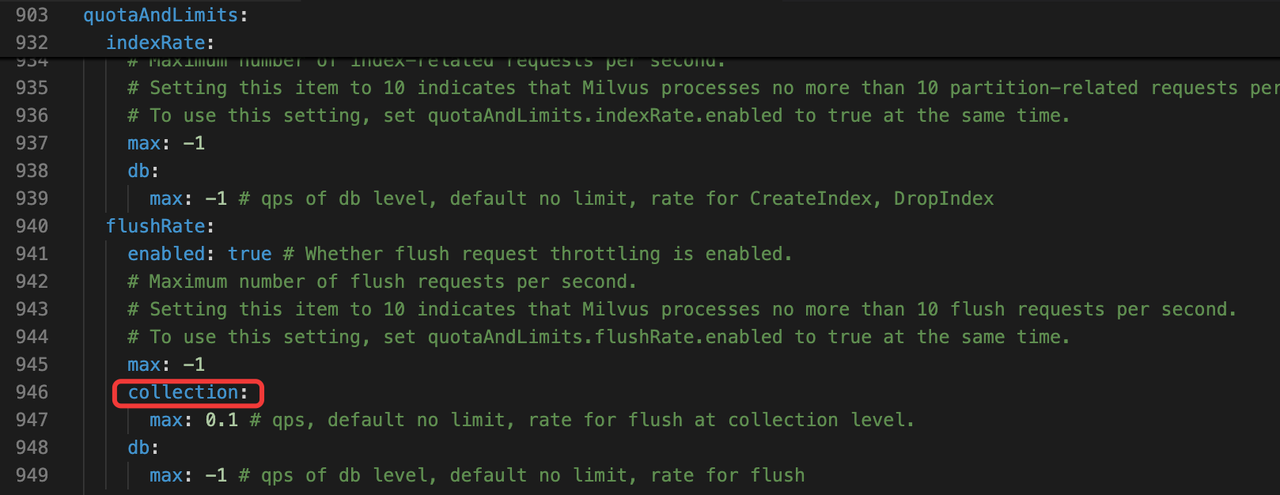
quotaAndLimits.flushRate.collection: Controls how frequently Milvus flushes data from a collection.
Default value:
0.1, which means the system allows one flush every 10 seconds.The flush operation seals a growing segment and persists it from the message queue to object storage.
Flushing too frequently can generate many small sealed segments, which increases compaction overhead and hurts query performance.
💡 Best practice: In most cases, let Milvus handle this automatically. A growing segment is sealed once it reaches maxSize * sealProportion, and sealed segments are flushed every 10 minutes. Manual flushes are only recommended after bulk inserts when you know no more data is coming.
Also keep in mind: data visibility is determined by the query’s consistency level, not the flush timing—so flushing does not make new data immediately queryable.
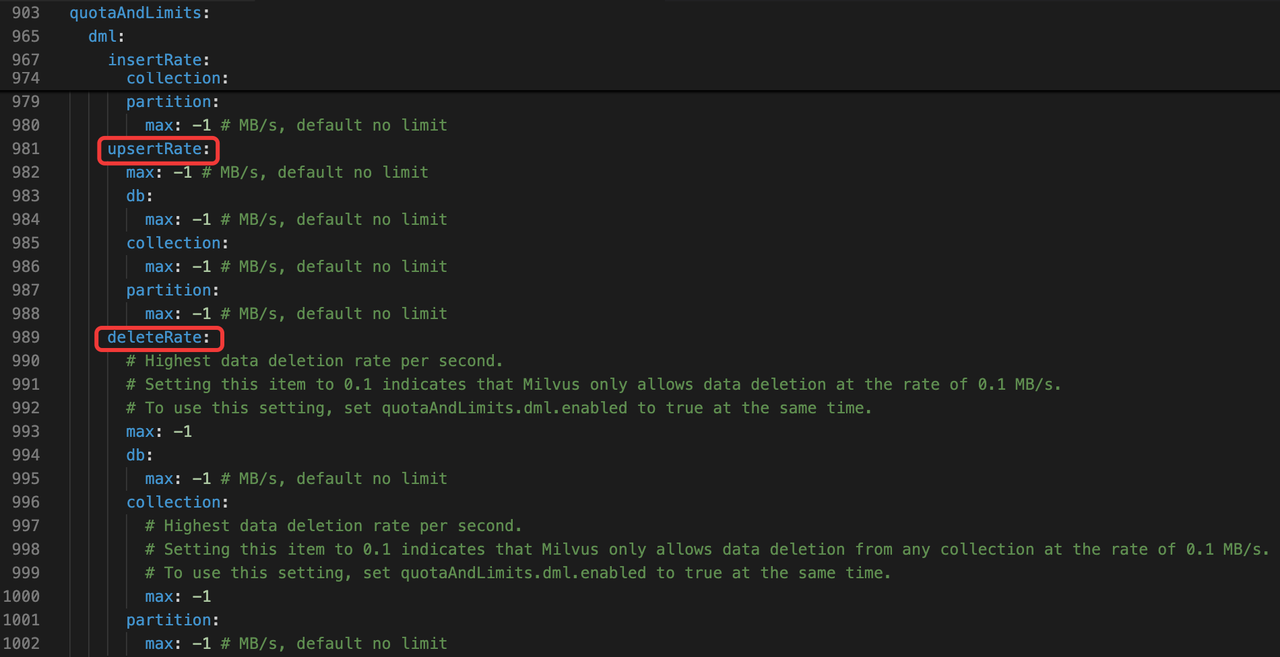
quotaAndLimits.upsertRate/quotaAndLimits.deleteRate: These parameters define the maximum allowed rate for upsert and delete operations.
Milvus relies on an LSM-Tree storage architecture, which means frequent updates and deletions trigger compaction. This can be resource-intensive and reduce overall throughput if not managed carefully.
It’s recommended to cap both
upsertRateanddeleteRateat 0.5 MB/s to avoid overwhelming the compaction pipeline.
🚀 Need to update a large dataset quickly? Use a collection alias strategy:
Insert new data into a fresh collection.
Once the update is complete, repoint the alias to the new collection. This avoids the compaction penalty of in-place updates and allows instant switchover.
Real-World Configuration Examples
Let’s walk through two common deployment scenarios to illustrate how Milvus configuration settings can be tuned to match different operational goals.
⚡ Example 1: High-Performance Configuration
When query latency is mission-critical—think recommendation engines, semantic search platforms, or real-time risk scoring—every millisecond counts. In these use cases, you’ll typically lean on graph-based indexes like HNSW or DISKANN, and optimize both memory usage and segment lifecycle behavior.
Key tuning strategies:
Increase
dataCoord.segment.maxSizeanddataCoord.segment.diskSegmentMaxSize: Raise these values to 4GB or even 8GB, depending on available RAM. Larger segments reduce the number of index builds and improve query throughput by minimizing segment fanout. However, larger segments do consume more memory at query time—so make sure yourindexNodeandqueryNodeinstances have enough headroom.Lower
dataCoord.segment.sealProportionanddataCoord.segment.expansionRate: Target a growing segment size around 200MB before sealing. This keeps segment memory usage predictable and reduces the burden on the Delegator (the queryNode leader that coordinates distributed search).
Rule of thumb: Favor fewer, larger segments when memory is abundant and latency is a priority. Be conservative with seal thresholds if index freshness matters.
💰 Example 2: Cost-Optimized Configuration
If you’re prioritizing cost efficiency over raw performance—common in model training pipelines, low-QPS internal tools, or long-tail image search—you can trade off recall or latency to significantly reduce infrastructure demands.
Recommended strategies:
Use index quantization: Index types like
SCANN,IVF_SQ8, orHNSW_PQ/PRQ/SQ(introduced in Milvus 2.5) dramatically reduce index size and memory footprint. These are ideal for workloads where precision is less critical than scale or budget.Adopt a disk-backed indexing strategy: Set the index type to
DISKANNto enable pure disk-based search. Enablemmapfor selective memory offloading.
For extreme memory savings, enable mmap for the following: vectorField, vectorIndex, scalarField, and scalarIndex. This offloads large chunks of data to virtual memory, reducing resident RAM usage significantly.
⚠️ Caveat: If scalar filtering is a major part of your query workload, consider disabling mmap for vectorIndex and scalarIndex. Memory mapping can degrade scalar query performance in I/O-constrained environments.
Disk usage tip
HNSW indexes built with
mmapcan expand total data size by up to 1.8×.A 100GB physical disk might realistically only accommodate ~50GB of effective data when you account for index overhead and caching.
Always provision extra storage when working with
mmap, especially if you also cache the original vectors locally.
Conclusion
Tuning Milvus isn’t about chasing perfect numbers—it’s about shaping the system around your workload’s real-world behavior. The most impactful optimizations often come from understanding how Milvus handles I/O, segment lifecycle, and indexing under pressure. These are the paths where misconfiguration hurts the most—and where thoughtful tuning yields the biggest returns.
If you’re new to Milvus, the configuration parameters we’ve covered will cover 80–90% of your performance and stability needs. Start there. Once you’ve built some intuition, dig deeper into the full milvus.yaml spec and the official documentation—you’ll uncover fine-grained controls that can take your deployment from functional to exceptional.
With the right configurations in place, you’ll be ready to build scalable, high-performance vector search systems that align with your operational priorities—whether that means low-latency serving, cost-efficient storage, or high-ingest analytical workloads.
- Introduction
- Configuration Categories
- Milvus Dependency Component Configurations
- Milvus Internal Component Configurations
- Other Functional Configurations
- Real-World Configuration Examples
- Conclusion
On This Page
Try Managed Milvus for Free
Zilliz Cloud is hassle-free, powered by Milvus and 10x faster.
Get StartedLike the article? Spread the word