

Milvus를 활용한 다중 모달 RAG


이 튜토리얼의 최종 결과를 직접 체험해 보고 싶으시다면, 온라인 데모 페이지로 바로 이동하실 수 있습니다.
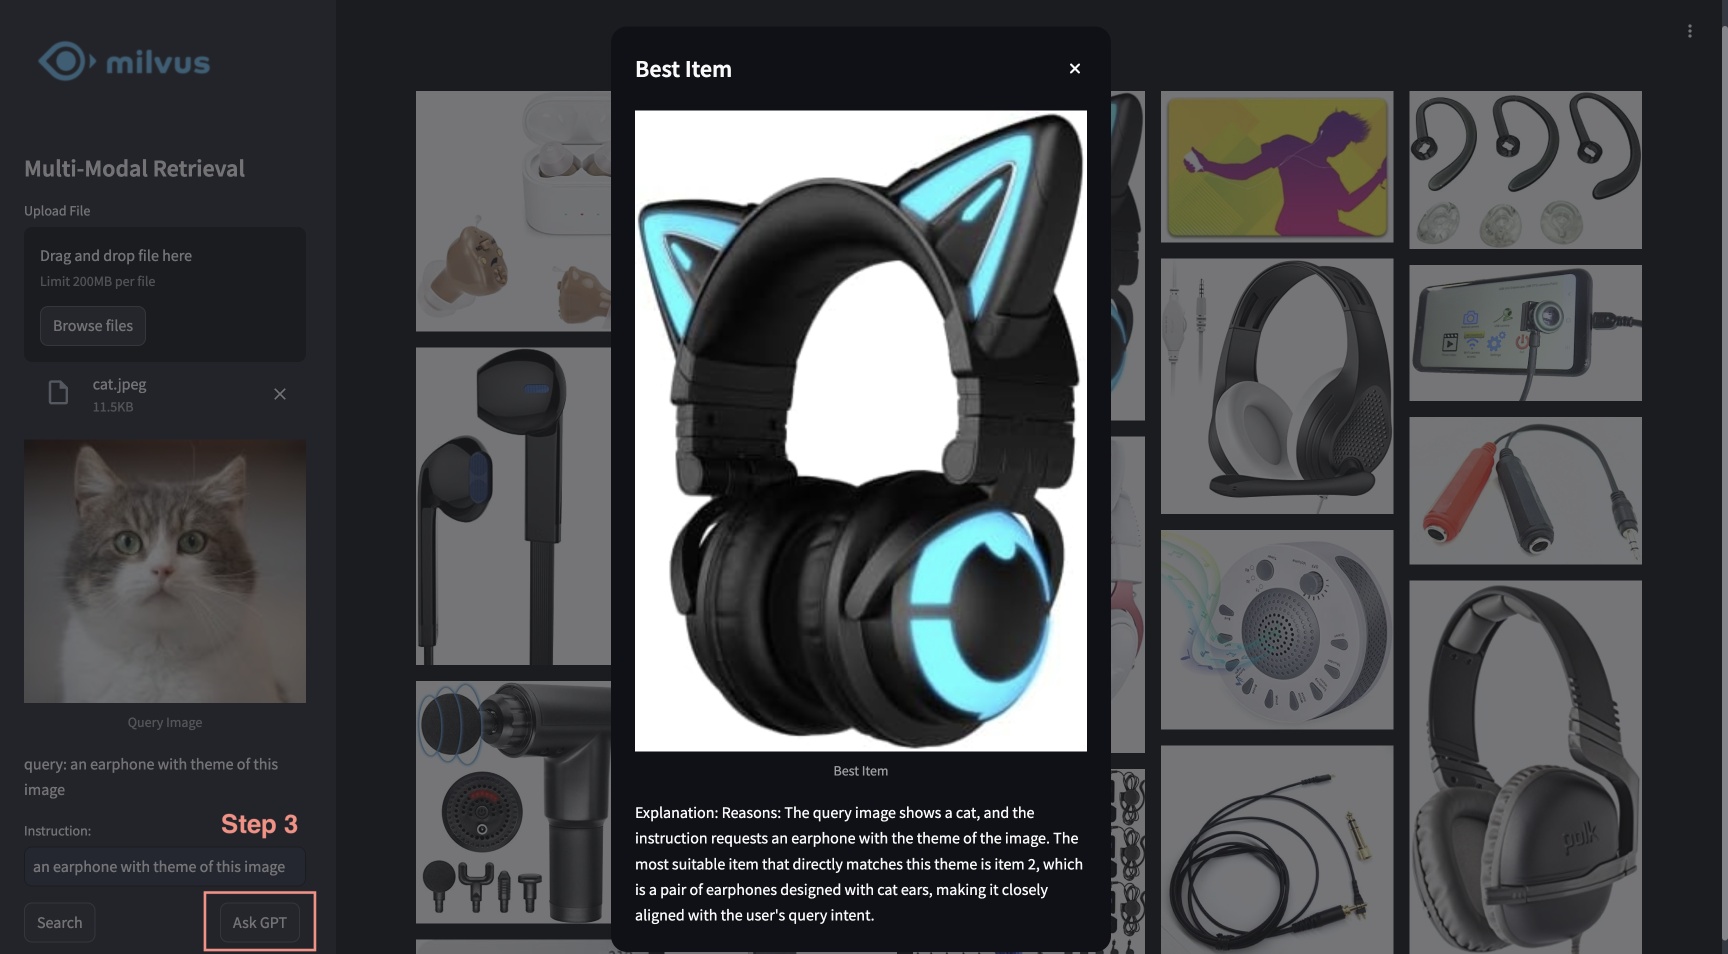
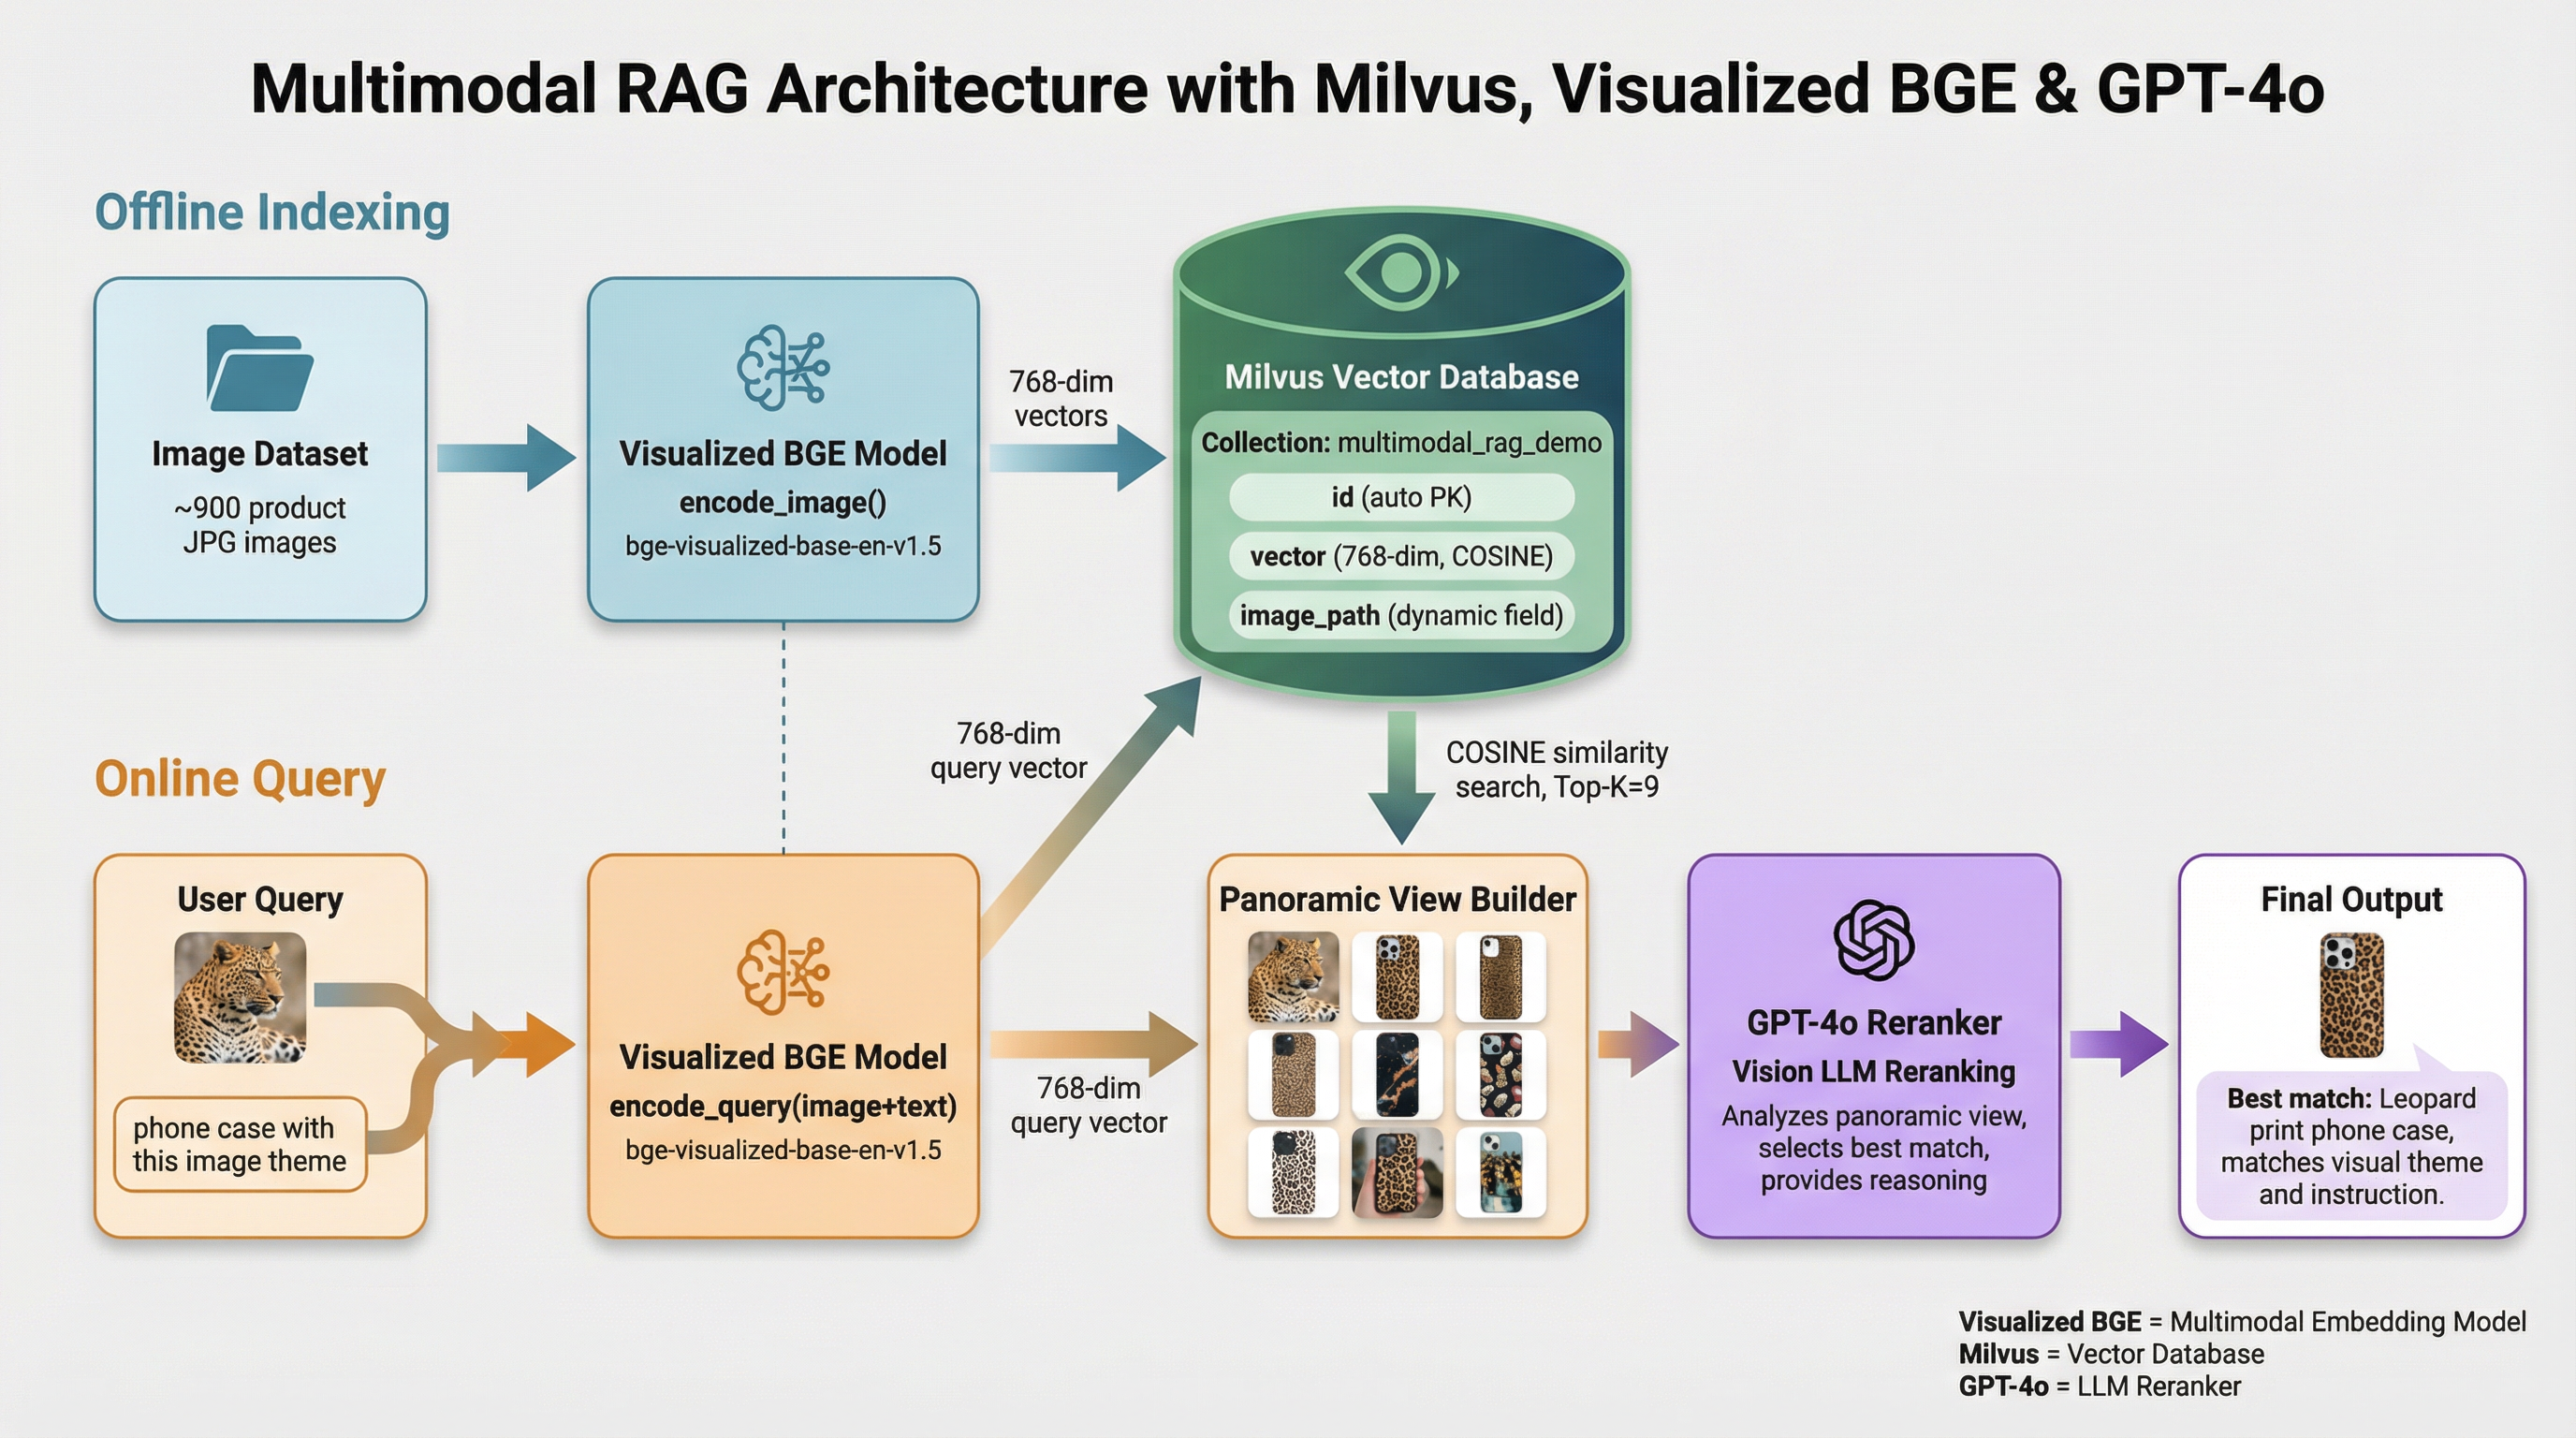
이 튜토리얼에서는 Milvus, Visualized BGE 모델, GPT-4o가 결합된 멀티모달 RAG를 소개합니다. 이 시스템을 통해 사용자는 이미지를 업로드하고 텍스트 지침을 편집할 수 있으며, BGE의 복합 검색 모델이 이를 처리하여 후보 이미지를 검색합니다. 그 후 GPT-4o가 재순위 지정(reranking) 역할을 수행하여 가장 적합한 이미지를 선정하고, 선택 근거를 제공합니다. 이 강력한 조합은 효율적인 검색을 위한 Milvus, 정밀한 이미지 처리 및 매칭을 위한 BGE 모델, 그리고 고급 재순위 지정을 위한 GPT-4o를 활용하여 매끄럽고 직관적인 이미지 검색 경험을 가능하게 합니다.
준비
의존성 설치
$ pip install --upgrade pymilvus openai datasets opencv-python timm einops ftfy peft tqdm
$ git clone https://github.com/FlagOpen/FlagEmbedding.git
$ pip install -e FlagEmbedding
Google Colab을 사용하는 경우, 방금 설치한 종속성을 활성화하려면 런타임을 다시 시작해야 할 수 있습니다(화면 상단의 “Runtime” 메뉴를 클릭하고 드롭다운 메뉴에서 “Restart session”을 선택하세요).
데이터 다운로드
다음 명령어를 실행하면 예제 데이터를 다운로드하여 “./images_folder”라는 로컬 폴더에 추출할 수 있습니다. 여기에는 다음이 포함됩니다:
- images: “Appliance”, “Cell_Phones_and_Accessories”, “Electronics” 카테고리의 이미지 약 900장이 포함된 Amazon Reviews 2023의 하위 집합입니다.
- leopard.jpg: 예제 쿼리 이미지.
$ wget https://github.com/milvus-io/bootcamp/releases/download/data/amazon_reviews_2023_subset.tar.gz
$ tar -xzf amazon_reviews_2023_subset.tar.gz
임베딩 모델 불러오기
이미지와 텍스트 모두에 대한 임베딩을 생성하기 위해 시각화된 BGE 모델 “bge-visualized-base-en-v1.5”를 사용할 것입니다.
1. 가중치 다운로드
$ wget https://huggingface.co/BAAI/bge-visualized/resolve/main/Visualized_base_en_v1.5.pth
2. 인코더 구축
import torch
from visual_bge.modeling import Visualized_BGE


class Encoder:
    def __init__(self, model_name: str, model_path: str):
        self.model = Visualized_BGE(model_name_bge=model_name, model_weight=model_path)
        self.model.eval()

    def encode_query(self, image_path: str, text: str) -> list[float]:
        with torch.no_grad():
            query_emb = self.model.encode(image=image_path, text=text)
        return query_emb.tolist()[0]

    def encode_image(self, image_path: str) -> list[float]:
        with torch.no_grad():
            query_emb = self.model.encode(image=image_path)
        return query_emb.tolist()[0]


model_name = "BAAI/bge-base-en-v1.5"
model_path = "./Visualized_base_en_v1.5.pth"  # Change to your own value if using a different model path
encoder = Encoder(model_name, model_path)
데이터 불러오기
이 섹션에서는 예제 이미지를 해당 임베딩과 함께 데이터베이스에 로드합니다.
임베딩 생성
데이터 디렉터리에서 모든 JPEG 이미지를 불러온 다음, 인코더를 적용하여 이미지를 임베딩으로 변환합니다.
import os
from tqdm import tqdm
from glob import glob


# Generate embeddings for the image dataset
data_dir = (
    "./images_folder"  # Change to your own value if using a different data directory
)
image_list = glob(
    os.path.join(data_dir, "images", "*.jpg")
)  # We will only use images ending with ".jpg"
image_dict = {}
for image_path in tqdm(image_list, desc="Generating image embeddings: "):
    try:
        image_dict[image_path] = encoder.encode_image(image_path)
    except Exception as e:
        print(f"Failed to generate embedding for {image_path}. Skipped.")
        continue
print("Number of encoded images:", len(image_dict))
Generating image embeddings: 100%|██████████| 900/900 [00:20<00:00, 44.08it/s]

Number of encoded images: 900
Milvus에 삽입
해당 경로와 임베딩을 가진 이미지를 Milvus 컬렉션에 삽입합니다.
MilvusClient 의 인자에 대해서는:
uri를 로컬 파일(예:./milvus_demo.db)로 설정하는 것이 가장 편리한 방법입니다. 이렇게 하면 Milvus Lite가 자동으로 이 파일에 모든 데이터를 저장합니다.- 대규모 데이터를 보유한 경우, Docker 또는 Kubernetes에서 더 높은 성능을 발휘하는 Milvus 서버를 구축할 수 있습니다. 이 경우,
uri대신 서버 URI(예:http://localhost:19530)를 로 설정해 주십시오. - Milvus 전용 풀 매니지드 클라우드 서비스인 Zilliz Cloud를 사용하려면, Zilliz Cloud의 공개 엔드포인트(Public Endpoint) 및 API 키에 해당하는
uri및token값을 조정하십시오.
from pymilvus import MilvusClient


dim = len(list(image_dict.values())[0])
collection_name = "multimodal_rag_demo"

# Connect to Milvus client given URI
milvus_client = MilvusClient(uri="./milvus_demo.db")

# Create Milvus Collection
# By default, vector field name is "vector"
milvus_client.create_collection(
    collection_name=collection_name,
    auto_id=True,
    dimension=dim,
    enable_dynamic_field=True,
)

# Insert data into collection
milvus_client.insert(
    collection_name=collection_name,
    data=[{"image_path": k, "vector": v} for k, v in image_dict.items()],
)
DEBUG:pymilvus.milvus_client.milvus_client:Created new connection using: 7f33daeed99a4d8e8a5e28d47673ecc8
DEBUG:pymilvus.milvus_client.milvus_client:Successfully created collection: multimodal_rag_demo
DEBUG:pymilvus.milvus_client.milvus_client:Successfully created an index on collection: multimodal_rag_demo


{'insert_count': 900,
 'ids': [451537887696781312, 451537887696781313, ..., 451537887696782211],
 'cost': 0}
생성형 재순위 지정기를 활용한 다중 모달 검색
이 섹션에서는 먼저 다중 모달 쿼리를 통해 관련 이미지를 검색한 다음, LLM 서비스를 사용하여 결과의 순위를 재조정하고 설명과 함께 최상의 이미지를 찾아보겠습니다.
검색 실행
이제 이미지와 텍스트 지침으로 구성된 쿼리 데이터를 사용하여 고급 이미지 검색을 수행할 준비가 되었습니다.
query_image = os.path.join(
    data_dir, "leopard.jpg"
)  # Change to your own query image path
query_text = "phone case with this image theme"

# Generate query embedding given image and text instructions
query_vec = encoder.encode_query(image_path=query_image, text=query_text)

search_results = milvus_client.search(
    collection_name=collection_name,
    data=[query_vec],
    output_fields=["image_path"],
    limit=9,  # Max number of search results to return
    search_params={"metric_type": "COSINE", "params": {}},  # Search parameters
)[0]

retrieved_images = [hit.get("entity").get("image_path") for hit in search_results]
print(retrieved_images)
['./images_folder/images/518Gj1WQ-RL._AC_.jpg', './images_folder/images/41n00AOfWhL._AC_.jpg', './images_folder/images/51Wqge9HySL._AC_.jpg', './images_folder/images/51R2SZiywnL._AC_.jpg', './images_folder/images/516PebbMAcL._AC_.jpg', './images_folder/images/51RrgfYKUfL._AC_.jpg', './images_folder/images/515DzQVKKwL._AC_.jpg', './images_folder/images/51BsgVw6RhL._AC_.jpg', './images_folder/images/51INtcXu9FL._AC_.jpg']
GPT-4o를 활용한 재순위 지정
LLM을 사용하여 이미지를 순위 매기고, 사용자 쿼리와 검색된 결과를 바탕으로 최상의 결과에 대한 설명을 생성할 것입니다.
1. 파노라마 뷰 생성
import numpy as np
import cv2

img_height = 300
img_width = 300
row_count = 3


def create_panoramic_view(query_image_path: str, retrieved_images: list) -> np.ndarray:
    """
    creates a 5x5 panoramic view image from a list of images

    args:
        images: list of images to be combined

    returns:
        np.ndarray: the panoramic view image
    """
    panoramic_width = img_width * row_count
    panoramic_height = img_height * row_count
    panoramic_image = np.full(
        (panoramic_height, panoramic_width, 3), 255, dtype=np.uint8
    )

    # create and resize the query image with a blue border
    query_image_null = np.full((panoramic_height, img_width, 3), 255, dtype=np.uint8)
    query_image = Image.open(query_image_path).convert("RGB")
    query_array = np.array(query_image)[:, :, ::-1]
    resized_image = cv2.resize(query_array, (img_width, img_height))

    border_size = 10
    blue = (255, 0, 0)  # blue color in BGR
    bordered_query_image = cv2.copyMakeBorder(
        resized_image,
        border_size,
        border_size,
        border_size,
        border_size,
        cv2.BORDER_CONSTANT,
        value=blue,
    )

    query_image_null[img_height * 2 : img_height * 3, 0:img_width] = cv2.resize(
        bordered_query_image, (img_width, img_height)
    )

    # add text "query" below the query image
    text = "query"
    font_scale = 1
    font_thickness = 2
    text_org = (10, img_height * 3 + 30)
    cv2.putText(
        query_image_null,
        text,
        text_org,
        cv2.FONT_HERSHEY_SIMPLEX,
        font_scale,
        blue,
        font_thickness,
        cv2.LINE_AA,
    )

    # combine the rest of the images into the panoramic view
    retrieved_imgs = [
        np.array(Image.open(img).convert("RGB"))[:, :, ::-1] for img in retrieved_images
    ]
    for i, image in enumerate(retrieved_imgs):
        image = cv2.resize(image, (img_width - 4, img_height - 4))
        row = i // row_count
        col = i % row_count
        start_row = row * img_height
        start_col = col * img_width

        border_size = 2
        bordered_image = cv2.copyMakeBorder(
            image,
            border_size,
            border_size,
            border_size,
            border_size,
            cv2.BORDER_CONSTANT,
            value=(0, 0, 0),
        )
        panoramic_image[
            start_row : start_row + img_height, start_col : start_col + img_width
        ] = bordered_image

        # add red index numbers to each image
        text = str(i)
        org = (start_col + 50, start_row + 30)
        (font_width, font_height), baseline = cv2.getTextSize(
            text, cv2.FONT_HERSHEY_SIMPLEX, 1, 2
        )

        top_left = (org[0] - 48, start_row + 2)
        bottom_right = (org[0] - 48 + font_width + 5, org[1] + baseline + 5)

        cv2.rectangle(
            panoramic_image, top_left, bottom_right, (255, 255, 255), cv2.FILLED
        )
        cv2.putText(
            panoramic_image,
            text,
            (start_col + 10, start_row + 30),
            cv2.FONT_HERSHEY_SIMPLEX,
            1,
            (0, 0, 255),
            2,
            cv2.LINE_AA,
        )

    # combine the query image with the panoramic view
    panoramic_image = np.hstack([query_image_null, panoramic_image])
    return panoramic_image
쿼리 이미지와 검색된 이미지를 인덱스와 결합하여 파노라마 뷰를 생성합니다.
from PIL import Image

combined_image_path = os.path.join(data_dir, "combined_image.jpg")
panoramic_image = create_panoramic_view(query_image, retrieved_images)
cv2.imwrite(combined_image_path, panoramic_image)

combined_image = Image.open(combined_image_path)
show_combined_image = combined_image.resize((300, 300))
show_combined_image.show()
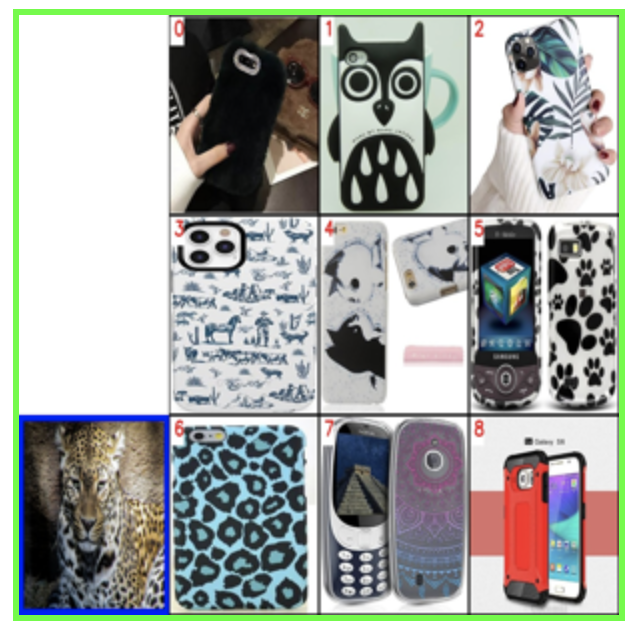 파노라마 뷰 생성
2. 재순위 지정 및 설명 제공
결합된 이미지를 적절한 프롬프트와 함께 멀티모달 LLM 서비스로 전송하여, 검색 결과를 순위 매기고 그 이유를 설명하도록 합니다. GPT-4o를 LLM으로 사용하려면 OpenAI API 키를 준비해야 합니다.
import requests
import base64

openai_api_key = "sk-***"  # Change to your OpenAI API Key


def generate_ranking_explanation(
    combined_image_path: str, caption: str, infos: dict = None
) -> tuple[list[int], str]:
    with open(combined_image_path, "rb") as image_file:
        base64_image = base64.b64encode(image_file.read()).decode("utf-8")

    information = (
        "You are responsible for ranking results for a Composed Image Retrieval. "
        "The user retrieves an image with an 'instruction' indicating their retrieval intent. "
        "For example, if the user queries a red car with the instruction 'change this car to blue,' a similar type of car in blue would be ranked higher in the results. "
        "Now you would receive instruction and query image with blue border. Every item has its red index number in its top left. Do not misunderstand it. "
        f"User instruction: {caption} \n\n"
    )

    # add additional information for each image
    if infos:
        for i, info in enumerate(infos["product"]):
            information += f"{i}. {info}\n"

    information += (
        "Provide a new ranked list of indices from most suitable to least suitable, followed by an explanation for the top 1 most suitable item only. "
        "The format of the response has to be 'Ranked list: []' with the indices in brackets as integers, followed by 'Reasons:' plus the explanation why this most fit user's query intent."
    )

    headers = {
        "Content-Type": "application/json",
        "Authorization": f"Bearer {openai_api_key}",
    }

    payload = {
        "model": "gpt-4o",
        "messages": [
            {
                "role": "user",
                "content": [
                    {"type": "text", "text": information},
                    {
                        "type": "image_url",
                        "image_url": {"url": f"data:image/jpeg;base64,{base64_image}"},
                    },
                ],
            }
        ],
        "max_tokens": 300,
    }

    response = requests.post(
        "https://api.openai.com/v1/chat/completions", headers=headers, json=payload
    )
    result = response.json()["choices"][0]["message"]["content"]

    # parse the ranked indices from the response
    start_idx = result.find("[")
    end_idx = result.find("]")
    ranked_indices_str = result[start_idx + 1 : end_idx].split(",")
    ranked_indices = [int(index.strip()) for index in ranked_indices_str]

    # extract explanation
    explanation = result[end_idx + 1 :].strip()

    return ranked_indices, explanation
순위 지정 후 이미지 인덱스와 최우수 결과의 이유를 확인합니다:
ranked_indices, explanation = generate_ranking_explanation(
    combined_image_path, query_text
)
3. 설명과 함께 최상의 결과 표시
print(explanation)

best_index = ranked_indices[0]
best_img = Image.open(retrieved_images[best_index])
best_img = best_img.resize((150, 150))
best_img.show()
Reasons: The most suitable item for the user's query intent is index 6 because the instruction specifies a phone case with the theme of the image, which is a leopard. The phone case with index 6 has a thematic design resembling the leopard pattern, making it the closest match to the user's request for a phone case with the image theme.
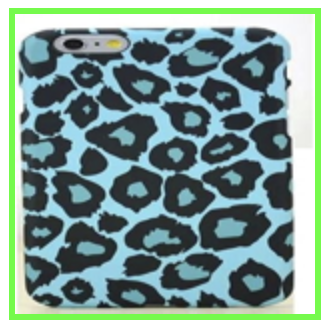 최우수 결과
빠른 배포
이 튜토리얼을 통해 온라인 데모를 시작하는 방법에 대해 알아보려면 예제 애플리케이션을 참조하십시오.
